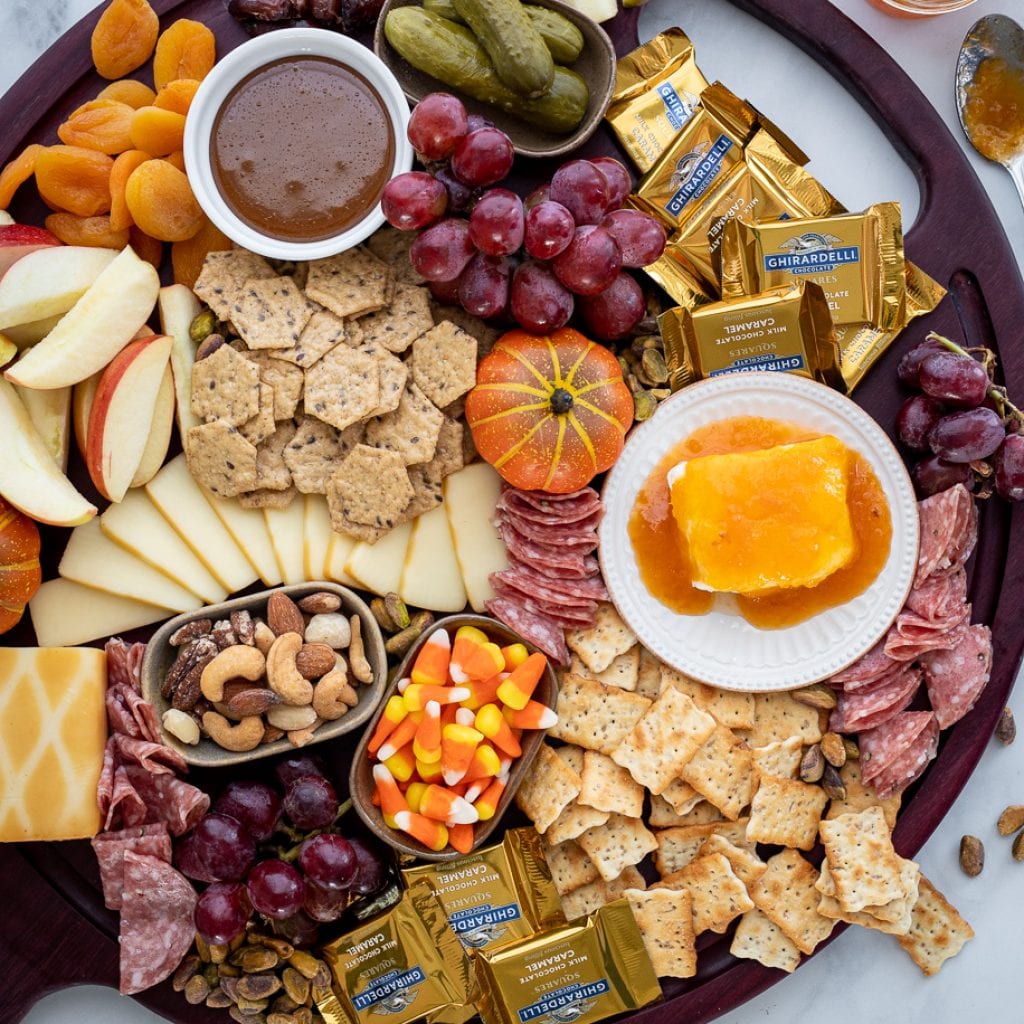
Do you want to know how to set up a Simple Fall Charcuterie Board like this? I promise it is just as simple as I am making this sound. I will share a few of my favorite tips I have learned over the last few years. Charcuterie boards are so perfect for get-togethers and parties. They generally offer something for everyone and are perfect for grazing.
Making The Perfect Charcuterie Board For Fall
First, know your consumers. This board was made for my family, so there were really simple, common foods on it. No stinky cheeses that would scare my children :).
It is mostly premade foods, so it came together quickly. If you are preparing it for most adults with a little sophisticated palate, you will want different foods.
I love to use a variety of foods, textures, and colors to create interest.

What Board Should you use?
There are no hard and fast rules for this. I have 3 boards I like to use. This beautiful one showed, which my talented brother made for me.
Another rectangle is a tray, with a little lip on it. This tray is probably my easiest to fill and transport because of the lip.
Then I have another oval-shaped one as well. I have used all 3, many times, and love them all for different reasons. Here is a list of the ones Amazon recommends in their section.
Creating the Board
Different levels and colors are always interesting on a charcuterie board. I love to start with the small dishes I will fill on the board.
Play around with placement until it looks right and balanced.

Can you have a fall-themed charcuterie board without candy corns? Okay, I mean there are people who hate them. If that is you, use another candy. We love the mixed nuts from Costco too, they always make an appearance.

Cheese Recommendations
Next up is cheese. I usually create some kind of a path with the cheese to guide your eye on the board. This is a great smoked cheddar. It is a cheese we can all agree on and the only one I used on the board.
If you have other cheeses, use them! The pickles are homemade pickles from my sister, Anna. Have a sister who is a master preserver has its advantages!

Now start filling in the board. I added a few kinds of crackers- I love these Townhouse Flatbread Crisps and Crunchmaster Multi-Seed Crisps. If you have others you love, use them.
I added in grapes as well, they are really good right now and I couldn't make a board without them. with the crackers, and anything else on the board, I love to have a variety of color, texture, and shapes.

Salami Rosettes
Salami Rosettes are really pretty and simple to fold. It's quarter fold and press. So, start with your piece of salami.

Fold the Salami in half and press.

Then fold it in half again. The unfolded sides will be up.

The Maple Caramel
I like to get the maple syrup caramel cooking while I am putting together the board, as it is really good served warm. This is a great refined sugar-free caramel, and it low carb as well. Plus, it is really easy to make!
Add all ingredients to a heavy bottom pan. Heat over medium heat and bring to a boil.

If you have a candy thermometer you will want the caramel to reach about 230 degrees. If you don't have a thermometer, let it go for 6-8 minutes at a low boil. You want it to thicken just a little. You will see the bubble start to change and look differently.

Now, pour it into the ramekin or whatever dish you have on your board.

You guys, it looks just as good as this photo makes it look!

The Finished Simple Fall Charcuterie Board
we love a spicy jam over cream cheese for topping our crackers. This one was an apricot habanero, again from my sister Anna. I finished filling in with the sliced apples, dried apricots and dates, Ghiradelli chocolates, and lastly filled in any holes I had with pistachios. This board is epic for snacking and ready to go in under 30 minutes!

Are you looking for some drinks to go with this board? Henry Winehard's is a family favorite!

Simple Maple Caramel
Ingredients
- 1 cup pure maple syrup
- 2 tablespoons butter
- ¼ cup heavy cream
Instructions
- Add the ingredients to heavy bottom pan and heat over medium-low. Stir occasionally. If you have a candy thermometer, you will want to cook this to about 230 degrees. If you don't, bring to a low boil, reduce heat to low, and cook for about 5-6 minutes after it boils. The caramel should thicken just slightly as it cooks. This is wonderful caramel to use for a dip for apples, over ice cream, pie, cheesecake, or just about anything you can think of!If you aren't using it right away, it will hold in the fridge for about 3-5 days. Just make sure it is stored in an airtight container. Simply reheat when you are ready to use!Now, sit back and enjoy. You deserve it!


Did you make this recipe? Let me know!